SCCM OSD Task Sequence User Input Window

It is always a unique challenge of having to build an OSD experience that includes providing a great user experience during the deployment of a new operating system.
The attached application would allow you to present a front-end to an active end-user who is executing the SCCM task sequence……
Keywords: SCCM tasksequence UI, SCCM Task Sequence User interface, SCCM task sequence Set computer name.
!!!! Note for production workloads !!!!
Use sccmtspsi for full free automation suite –> https://sccmtspsi.com/sccmtspsi/
If you are not after a robust enterprise solution and for non-production workloads use the below.
Update Notes:
BUG Fixed 06-09-2014: Now run the application from anywhere in the PE filesystem.
UI advancement 25-08-2014: Full screen option introduced.
Resolution Requirement:
Working screen resolution for the full screen mode: 1024 X 768 and 1280 X 768. Minimum ‘Y’ resolution is 768. Window mode will work under all resolutions.
Note for production workloads:
Use sccmtspsi for full automation suite –> https://sccmtspsi.com/sccmtspsi/
Application Description:
It is always a unique challenge of having to build an OSD experience that includes providing a great user experience during the deployment of a new operating system.
The attached application would allow you to present a front-end to an active end-user who is executing the SCCM task sequence.
Note: The same CSV file is (optionally) used to populate the fields in the application and the altered data is saved back to the same CSV.
This application has two launch modes:
- Window Mode
- Full Screen Mode
Window Mode:

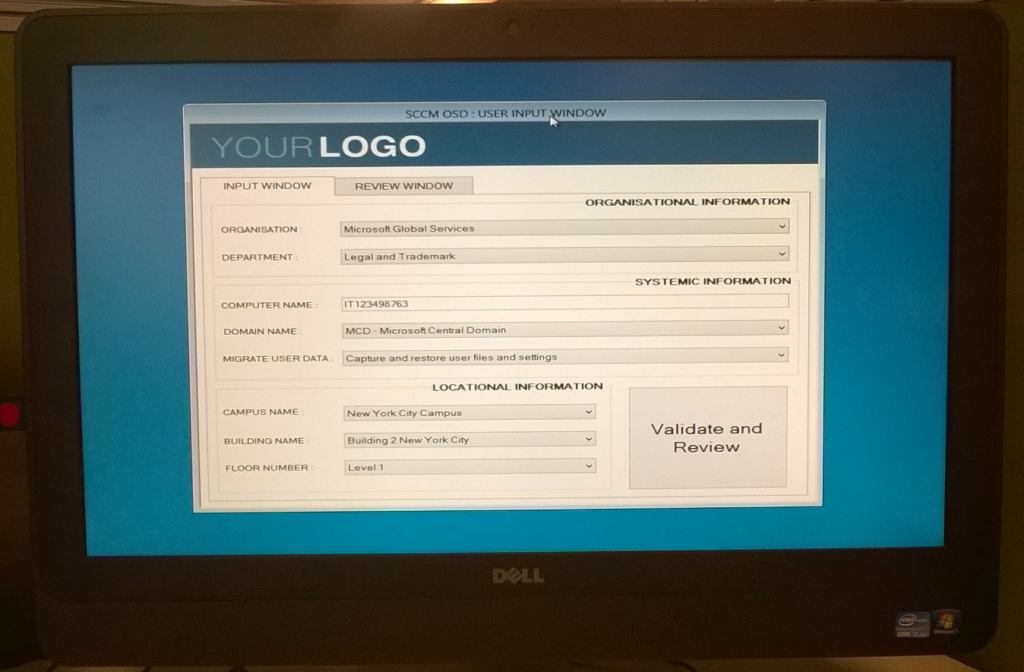
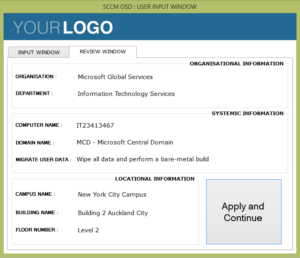
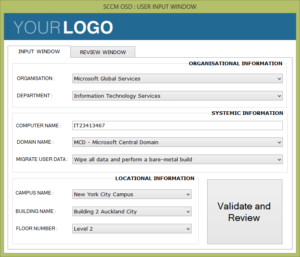
Full Screen Mode in WinPE:

Full Screen Mode in WinPE:
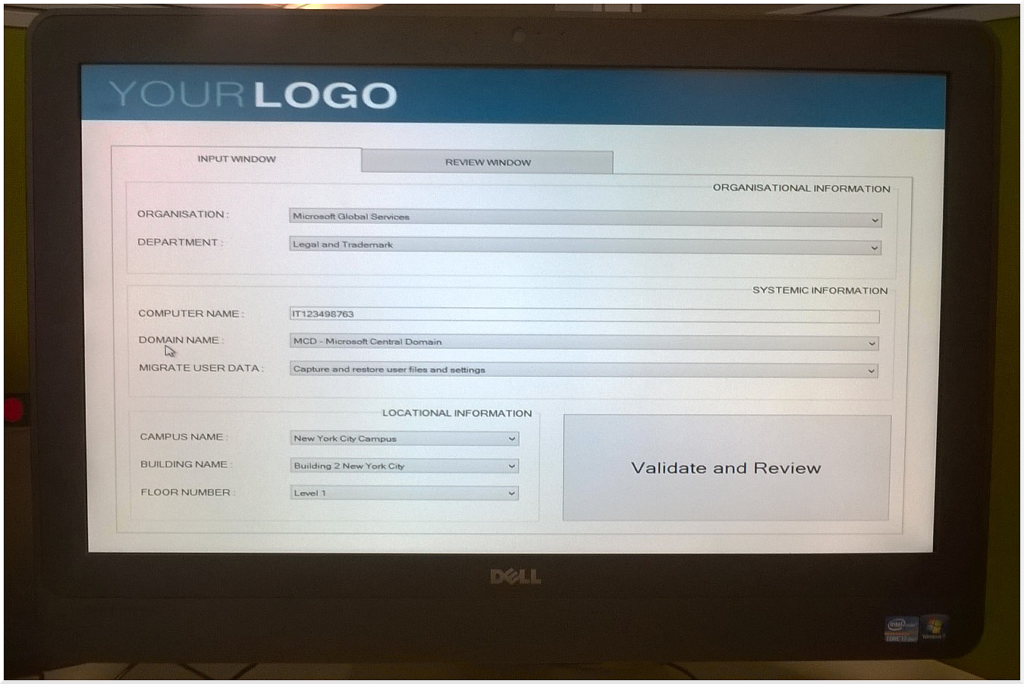

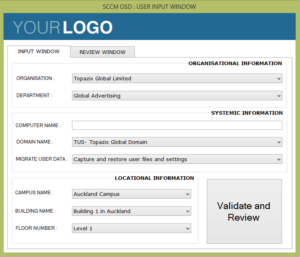
Window Mode in WinPE:

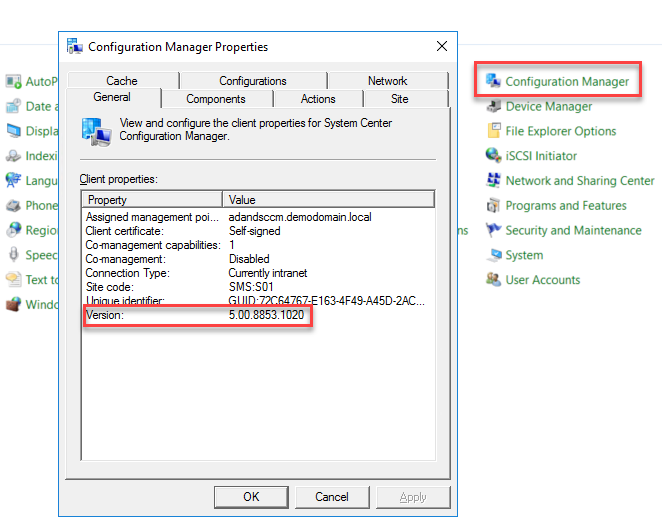
Prerequisites: WinPE 5 or later (if any)
Enable the following components in WinPE
- WinPE-WMI
- WinPE-NetFX
- WinPE-Scripting
- WinPE-PowerShell
Files:
This tool kit has four files. Three of the four files are REQUIRED for the tool kit to operate.
- banner.png
- SCCM2012TS-FullScreen-architechture.exe
- SCCM2012TS-WindowView-architechture.exe
- SCCMUIvarlist.csv [optional input – but will be automatically (re)created by the toolkit]
- UISchema.xml
Banner.png: This is a customizable banner. Edit the image to match your organisational themes. Dimensions (height and width) of the current image should be strictly maintained.
SCCM2012TSUI-*.exe: This is the tool kit -Fullscreen and Window modes. Written in dot net. It is imperative that the WinPE-NetFX component is selected in the WinPE boot image.
SCCMUIvarlist.csv: The input (optional) and output file. Input is used to prepopulate known variables into the user interface. Output is used to re-introduce the edited variables to the task sequence.
This is a simple one line CSV (Comma Separated Value) file. The CSV has components, set in the following order.
<OrganisationID>, <DepartmentID>, <ComputerNameID>, <DomainNameID>, <CaptureUserStateID>, <CampusID>, <BuildingID>, <FloorID>
If the CSV is already populated with the reference-ID’s, their corresponding entries from the ‘UISchema.xml’ will be loaded on to the ‘User Interface’
Example:
Topazixnz,depart13,TOPSYS34673,UOA,YES,campus1,camp1build1,FloorONE
You can (optionally) write Visual basic or PowerShell scripts to create (optionally) the CSV, from a list of task sequence variables or collection variables. The toolkit can then be used to edit the variables and rewrite to ‘SCCMUIvarlist.csv’. The CSV can then be read using Visual basic or PowerShell scripts to populate ‘task sequence variables’ for use in the task sequence.
UISchema.xml: This file is the heart and soul of the tool kit. Back-up the original xml before editing it.
The XML schema takes the following structure. The schema order should not be changed – Use the orignal UISchema.xml as a template.


Input – output
- Input happens via the (optional) ‘SCCMUIvarlist.csv’ file
- Output is written to the same ‘SCCMUIvarlist.csv’ file.
Scripts to optionally create ‘SCCMUIvarlist.csv’ from TSVariables and rewrite details from ‘SCCMUIvarlist.csv’ to TSVariables.
Script A: Create (Optionally) the ‘SCCMUIvarlist.csv’ file from tasksequence variables. This is just an example. Use the most primitive methods of scripting when scripting for WinPE. Vbscripts will be a better option.
$tsenv = New-Object -COMObject Microsoft.SMS.TSEnvironment ;
[string]$inposdorg = $tsenv.Value("_OSDOrgName") ;
[string]$inposddept = $tsenv.Value("_OSDDeptName") ;
[string]$inposdcomputername = $tsenv.Value("_OSDComputerName") ;
[string]$inposddomainame = $tsenv.Value("_OSDDomainName") ;
[string]$inposdusmt = $tsenv.Value("_OSDUSMT") ;
[string]$inposdcampus = $tsenv.Value("_OSDCampusName") ;
[string]$inposdbuilding = $tsenv.Value("_OSDBuildingName") ;
[string]$inposdfloor = $tsenv.Value("_OSDFloorName") ;
[string]$csv =$inposdorg + ',' + $inposddept + ',' +  $inposdcomputername + ',' + $inposddomainame + ',' + $inposdusmt +  ',' + $inposdcampus + ',' + $inposdbuilding + ',' + $inposdfloor;
$scriptdir = $MyInvocation.MyCommand.Path| split-path -parent;
$csv|Out-File "$scriptdir\SCCMUIvarlist.csv";
Script B: Write back to TSVariables from ‘SCCMUIvarlist.csv’ after the tool kit operation.
$tsenv = New-Object -COMObject Microsoft.SMS.TSEnvironment ;
$scriptdir = $MyInvocation.MyCommand.Path| split-path -parent;
$inpcsv = Get-Content "$scriptdir\SCCMUIvarlist.csv";
$comps = $inpcsv.Split(',');
$tsenv.Value("_OSDOrgName") = $comps[0];
$tsenv.Value("_OSDDeptName") = $comps[1];
$tsenv.Value("_OSDComputerName") = $comps[2];
$tsenv.Value("_OSDDomainName") = $comps[3];
$tsenv.Value("_OSDUSMT") = $comps[4];
$tsenv.Value("_OSDCampusName") = $comps[5];
$tsenv.Value("_OSDBuildingName") = $comps[6];
$tsenv.Value("_OSDFloorName") = $comps[7];
Tutorials on how to run an executable in WinPE under ServiceUI.exe are found on the internet. Below are some helpful hints.
- Find ServiceUI.exe (for the appropriate target architecture) and put it into the same directory as the tool kit.
- Create step in Task Sequence – Script A or similar – to write to (optional) input file ‘SCCMUIvarlist.csv’ from TSVariables. (to pre-populate Tool Kit fields)
- Create step in your Task Sequence to run –> ServiceUI.exe -process:TSProgressUI.exe <path-to-tool-kit>\SCCM2012TSUI.exe.
- Create step in your Task Sequence – Script B or similar – to write the eitries in ‘SCCMUIvarlist.csv’ back to the TSVariables.
ScreenShots
DOWNLOAD NOW
!!!! Note for production workloads !!!!
Use sccmtspsi for full free automation suite ==> https://sccmtspsi.com/sccmtspsi/
If you are not after a robust enterprise solution and for non-production workloads use the below.


Responses