- Overview
- Realm setup
- Active Directory & SCCM setup.
- Active directory - Security group
- Active directory - Broker account
- SCCM - Deployment collection
- SCCM - Administrative category for applications
- SCCM - Administrative category for office
- SCCM - Limiting collection for collections
- AD - Parent AD group for AD group list
- AD - Staging OU
- SCCM - Configuration directory
- SCCM - WinPE boot image setup
- Configuration tool & File
- Realm secret key
- Allowed WinPE instances
- Network access account
- Notification account
- Hostname formatting
- Automatically identify hostname
- Overrides
- Active directory staging OU
- MBAM Server details
- SMTP server details
- Notification types
- User state migration (USMT)
- Logs and Profiles location
- Disk setup
- Content availability check
- Error adding collection member
- Error adding AD group member
- Wait for Bitlocker decryption
- Approved hardware
- Extension Attributes
- Using sccmtspsi (Operator view)
- Task sequence steps
- Task sequence error codes
- sccmtspsi error codes
3.10.SCCM - WinPE boot image setup
This step walks you through the process of customizing your Windows PE image (Windows Assessment and Deployment Kit) with the sccmtspsi orchestration components.
The Windows PE customizer is one of the 4 elements of the sccmtspsi component package. Download here.
Open the “Windows PE customizer” application (requires administrative access).
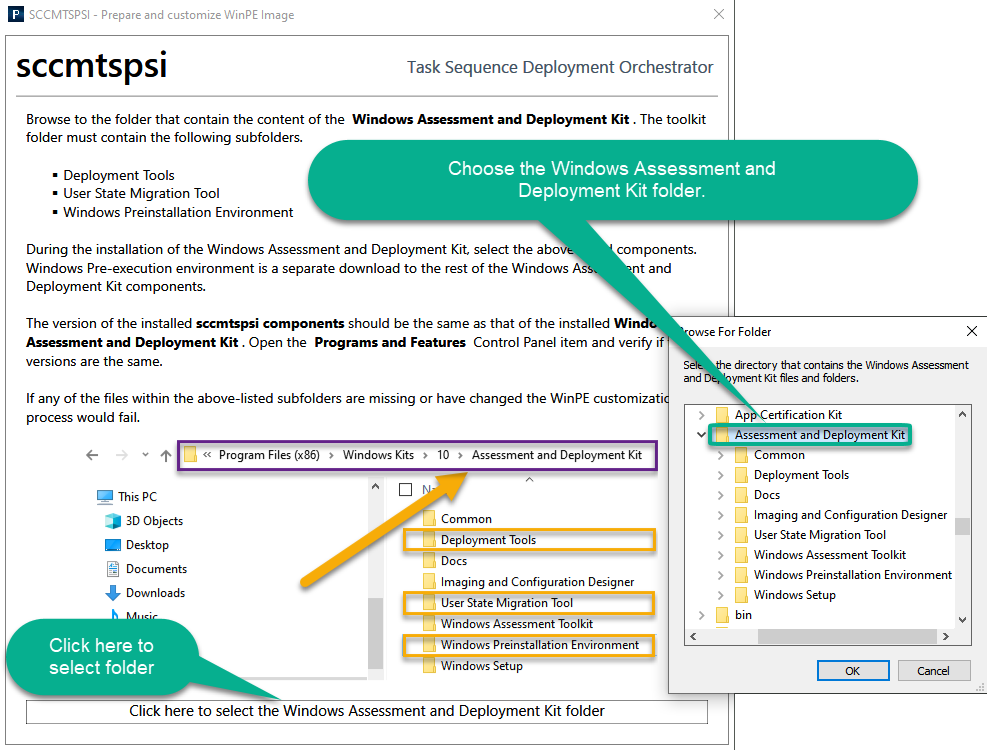
Browse to the folder that contains the content of the Windows Assessment and Deployment Kit. The toolkit folder must contain the following subfolders.
- Deployment Tools
- User State Migration Tool
- Windows Preinstallation Environment
Note: During the installation of the Windows Assessment and Deployment Kit, select the above-listed components. Windows Pre-execution environment is a separate download to the rest of the Windows Assessment and Deployment Kit components.
SCCMTSPI is updated regulary. So try and keep the version number of ADK WinPE Addon and the version number of “sccmtspsi components” in sync. See images below for more clarity.
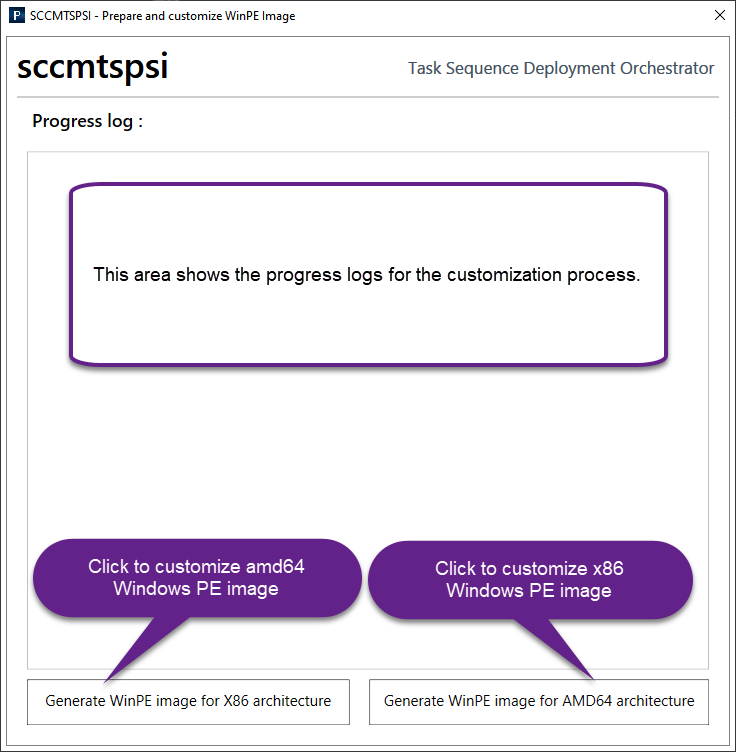
If the prerequisite is met, you will be moved to the next screen.
Based on your system architecture, click either on the “Generate WinPE image for AMD64 architecture” or the “Generate WinPE image for X86 architecture” button.
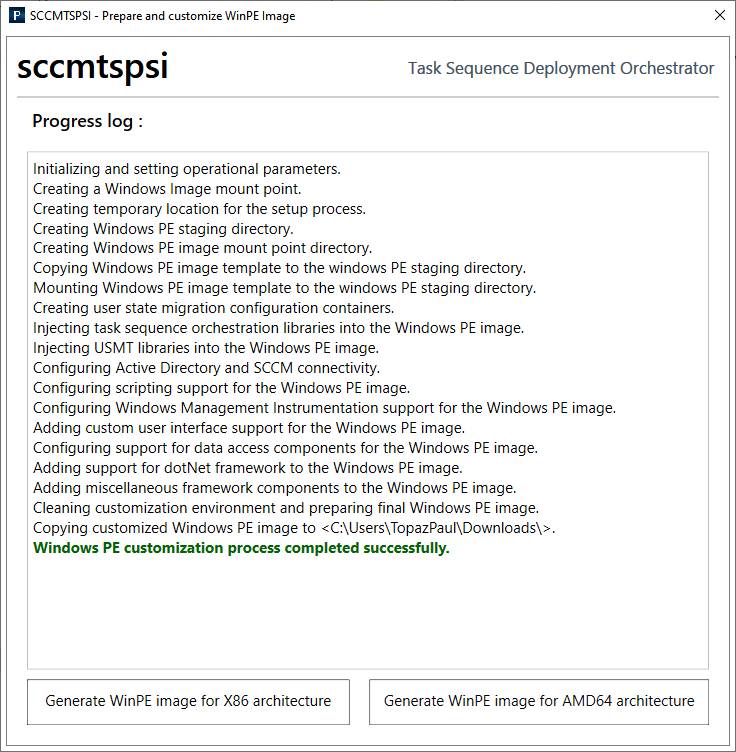
The application will do the following.
- Extract the Windows PE image from the Windows Assessment and Deployment Kit.
- Customize it with advanced orchestration features.
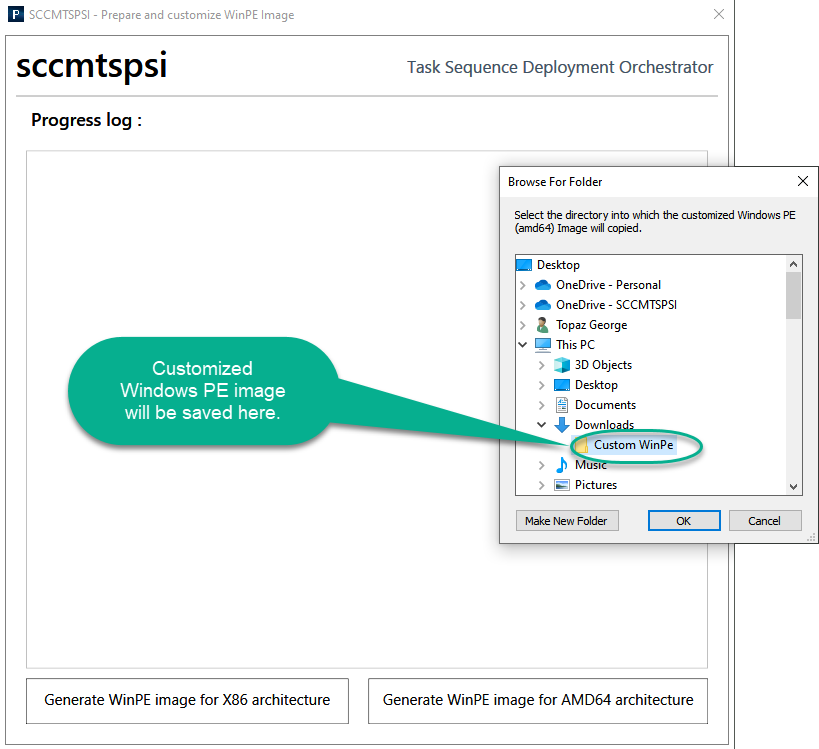
- Place the customized Windows PE image into a directory of your choice (as seen in the image below).
Wait for the process to complete. After the successful completion of the customization process, you’ll be able to retrieve the customized Windows PE image from the location you had chosen in the previous step.
Import the customized Windows PE image into SCCM.
Make the following changes to the imported boot image, after the sccmtspsi customized boot image has been imported into SCCM.
sccmtspsi.exe -realmname r01 -instancename yourinstancename -logindomain yourdomain.com -sccmserver sccmserver.yourdomain.com
 -adservername yourdomaincontroller.yourdomain.com -adconnectiontype adws -sccmsitecode S01
 -timeserver yourtimeserver.yourdomain.com -timezone "New Zealand Standard Time" -dnsserverip xxx.xxx.xxx.xxx
Note: Always copy and paste into a basic text editor and check if the command line is readable and in a single line.
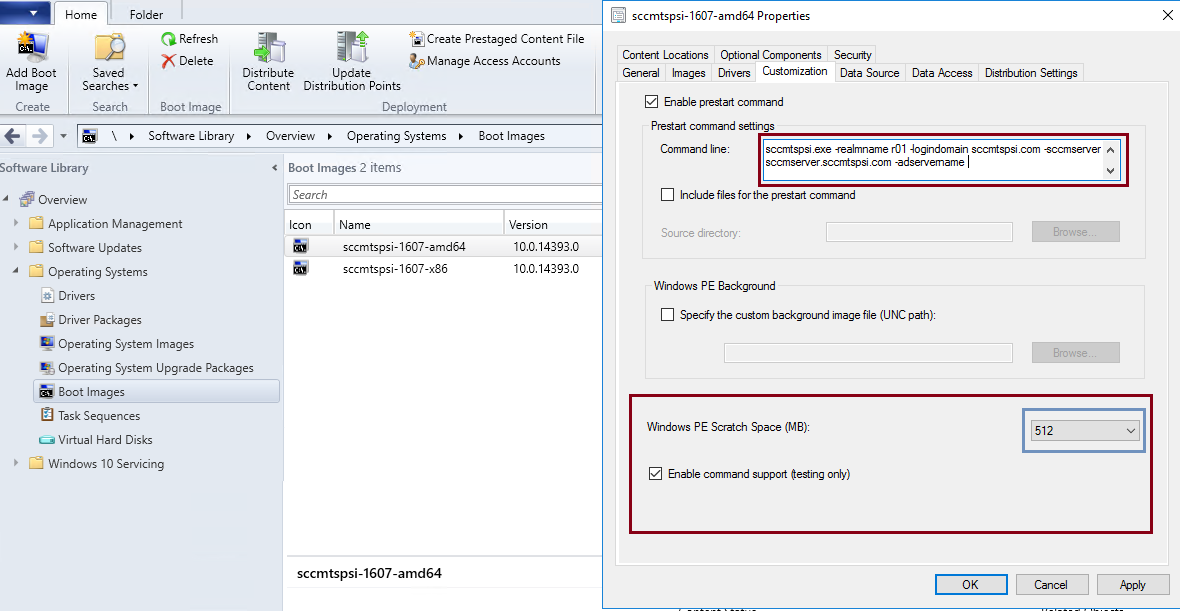
Note : All of the below parameters are required.
realmname : It is the 3 character Realm name.
instancename : The name of the WINPE instance. Edit the name (issue a new name) to rein in old USB and Full media. All allowed instances are set in the configuration file.
logindomain : This is your authenticating domain [Should be 2008 R2 or greater].
sccmserver : The fully qualified domain name of your SCCM management point server.
adservername : The fully qualified domain name of the domain controller wherein Active Directory Web Services is installed. [Should be 2008 R2 or greater].
adconnectiontype : adsi [Active Directory Service Interface] or adws [Active Directory Web Services].
sccmsitecode : The SCCM site to which the clients will be assigned to.
dnsserverip : The IP address of your DNS server.
timeserver : The fully qualified domain name of the time server from which sccmtspsi will synchronize the time & date. In a standard domain setup, the root domain controller will have the time service running on it.
timezone : Your time zone. Run the following Power Shell command to find your time zone.


